Follow for free plugins, new theme releases and theme news
Plugin Description
WP Mail plugin is simply a wp network mail or message system. User can send mail or messages to other users over one wp network.
Key Features of WP Mail
- WP Mail – It allows WordPress administrators as well as wordpress users to send/recieve emails to registered users with in respective wordpress environment or manually typed in registered user’s email addresses.
- Multiuser mails – You can send mails to multiple users by adding comma seprated mail ids ex:test@domain.com,test2@domain.com.
- Mail as draft – WP users can save message in draft.
How to use
- First Activate Plugin.
- Go to Wp Mail Menu
- To Create New Mail – Click Compose Menu
- To Check Message – Click Indox Menu= Minimum requirements for Mail System =
* WordPress 3.3+
* PHP 5.x
* MySQL 5.x
If any problem occurs, please contact us at http://www.webdesi9.com/support/.
Screenshots
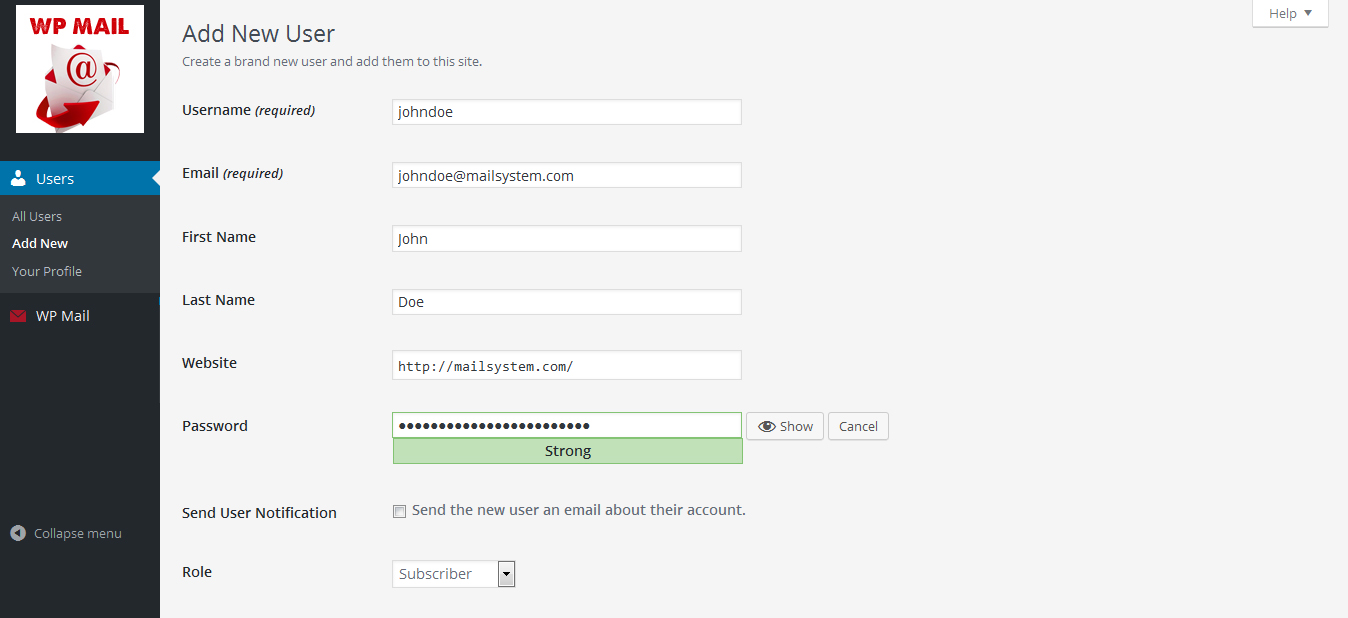
Create new user or give a signup form on you site frontend.
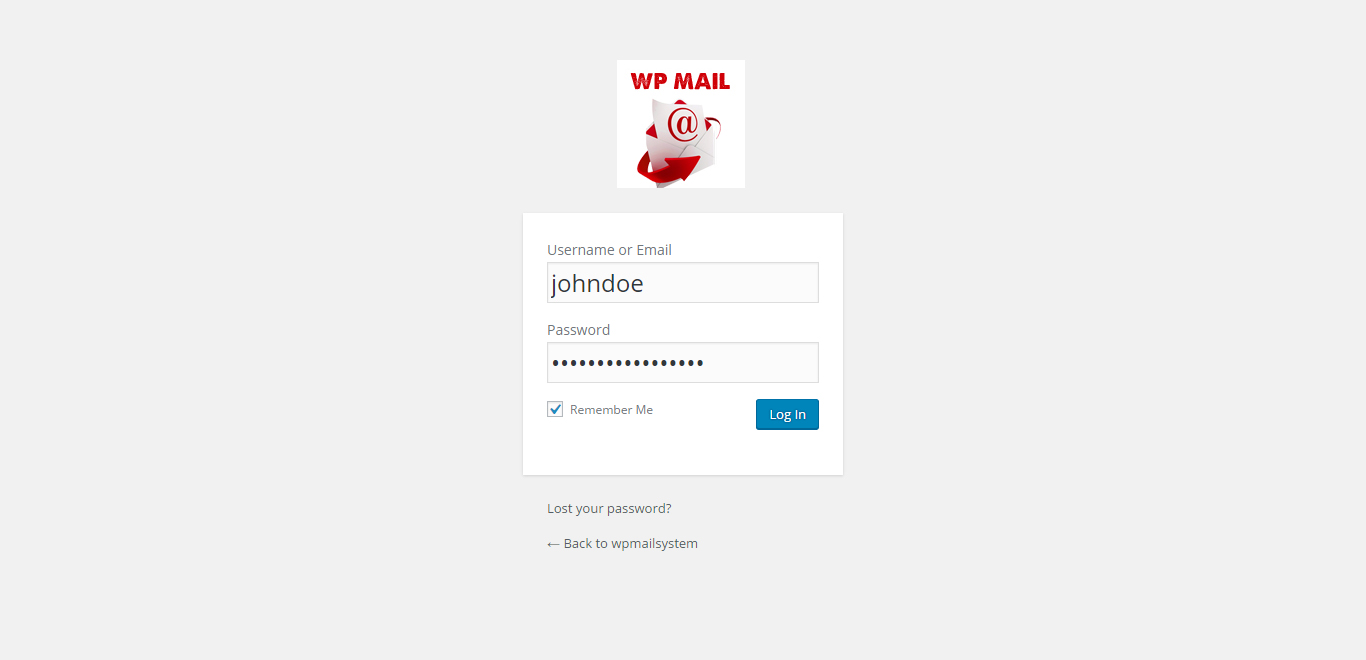
Go to login screeen and login with your credentials.
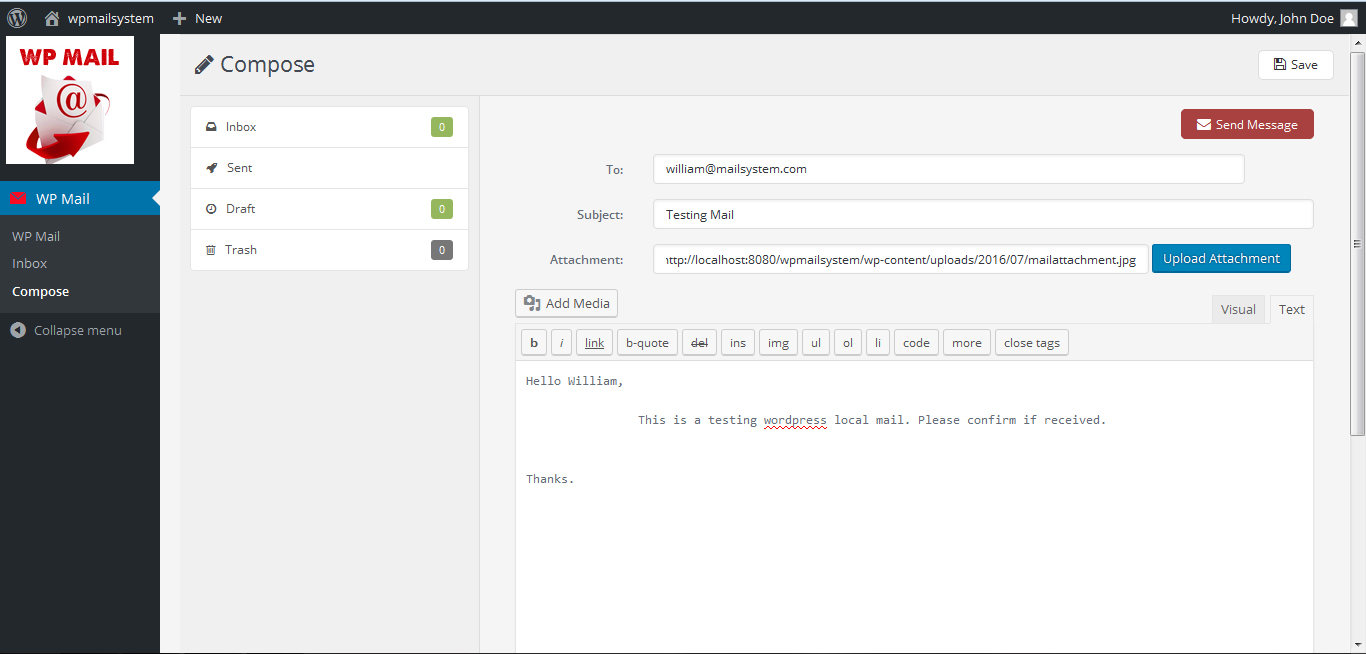
Click on Compose button to compose a mail to any of your wordpress register user. You should know email of user.
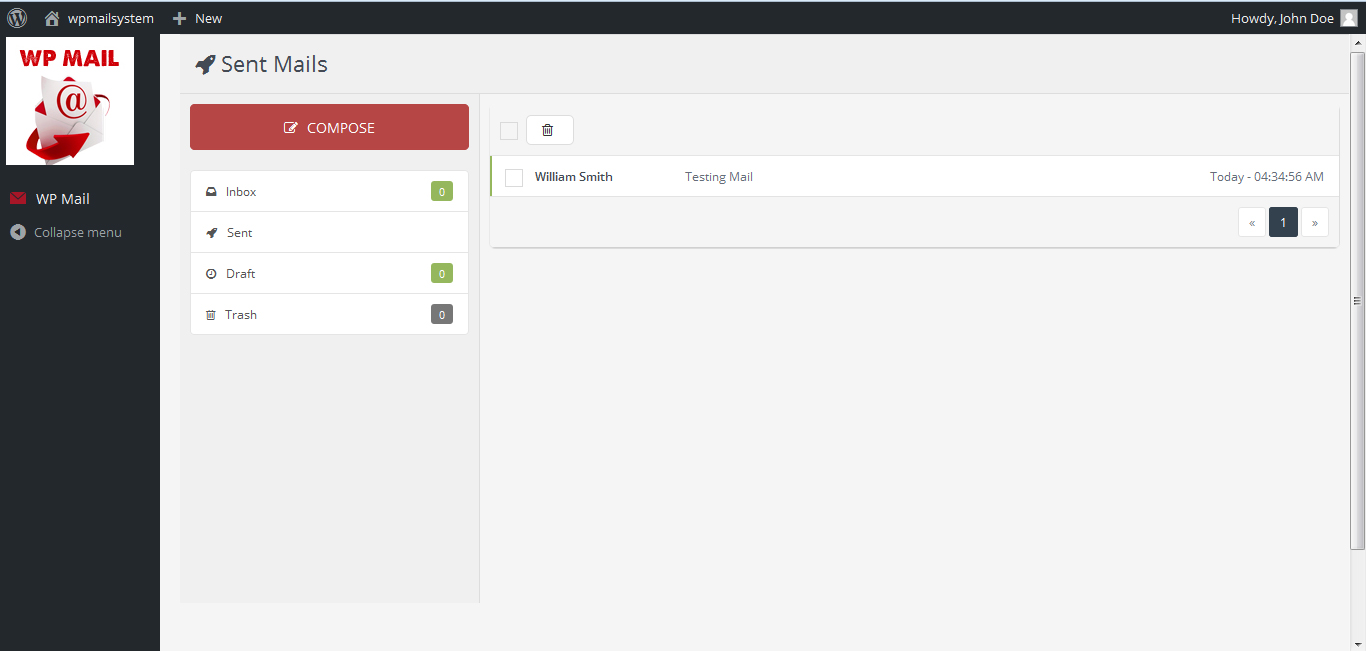
Check sent mail menu, Mail sent or Not.
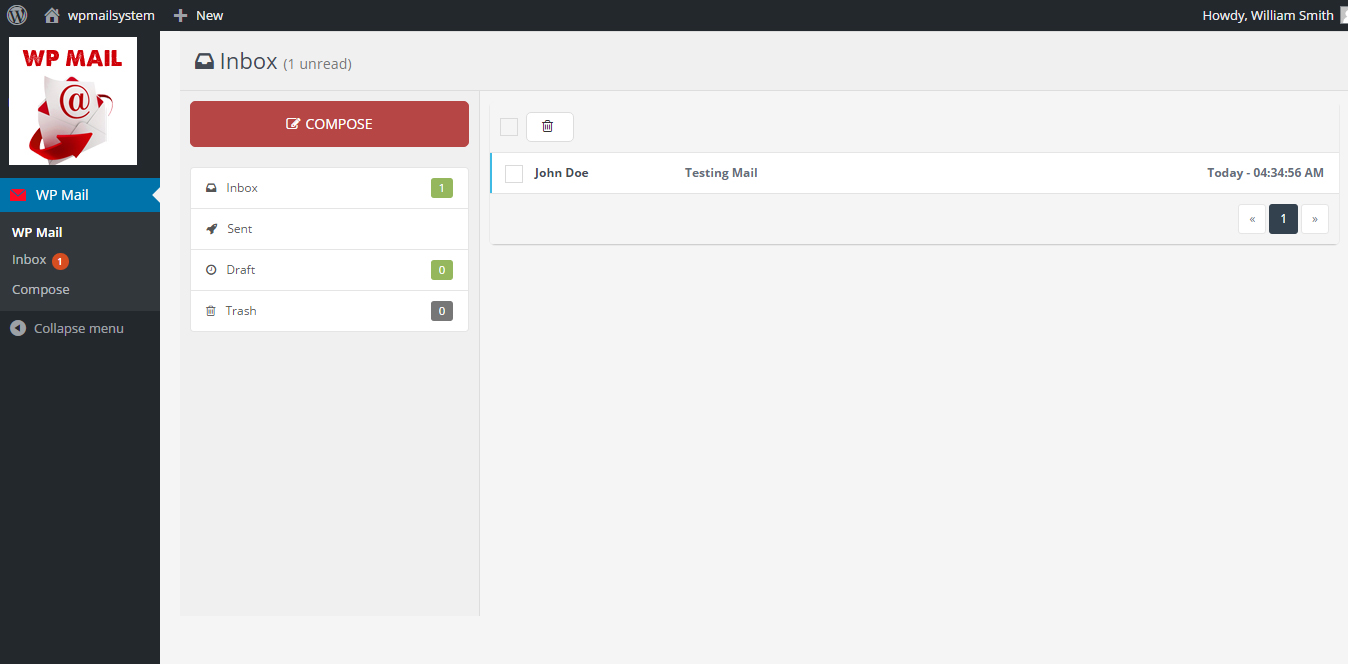
This is receiver’s inbox. Receiver can see new email in inbox.
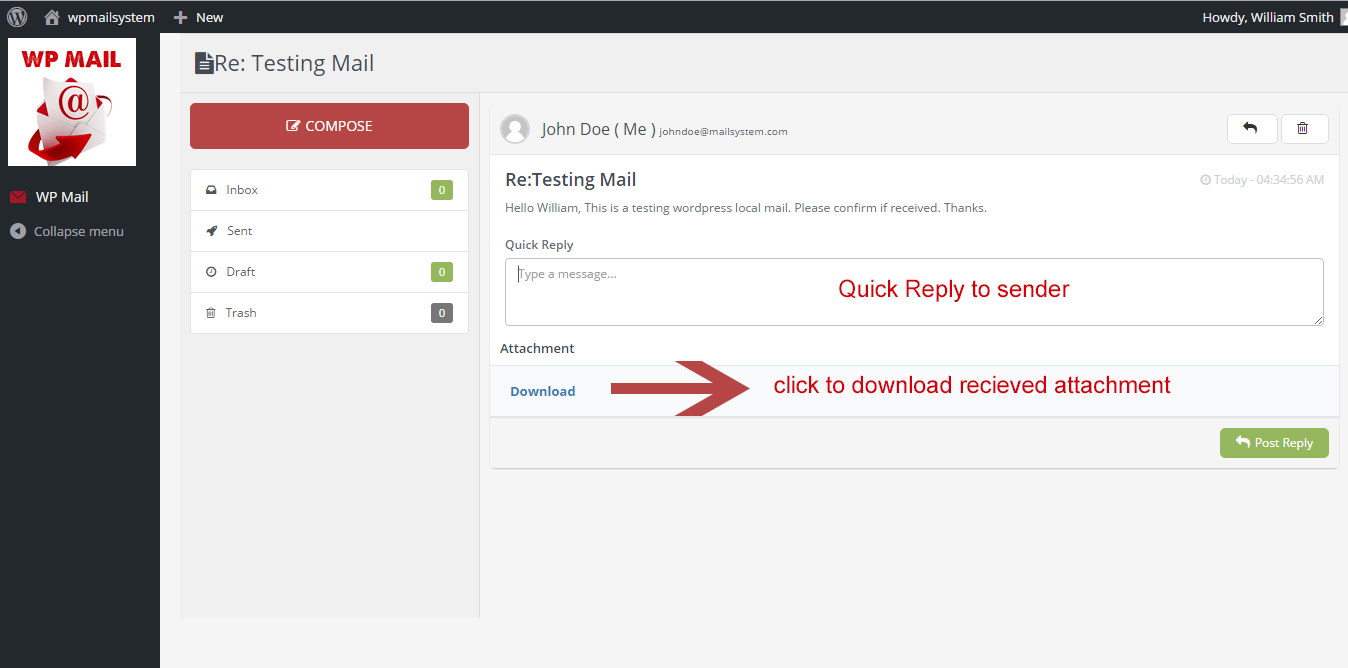
Email view screen. You can read full message here. Also download attachment if received. You can also make a quick reply to sender.
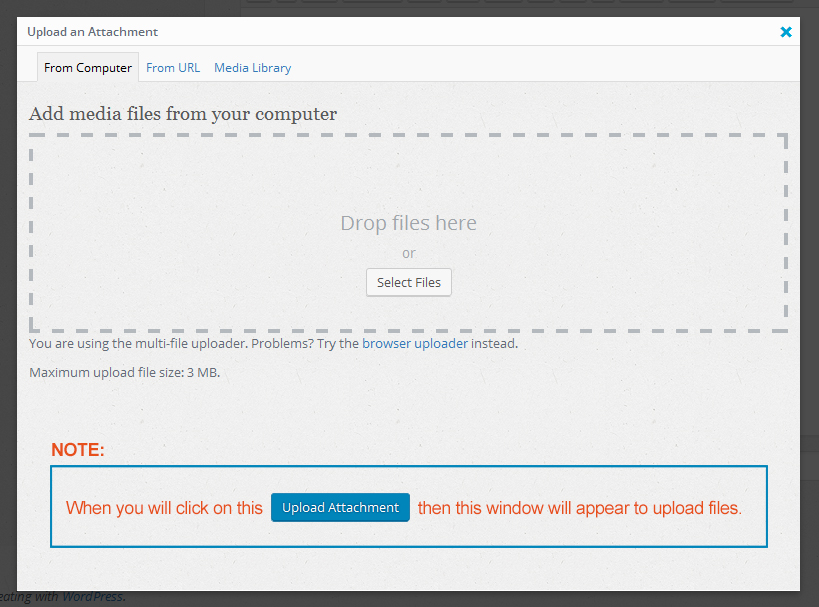
- How to upload attachment – when click on Upload Attachment button in compose mail section this window will appear. You can drag and drop your attachment here.
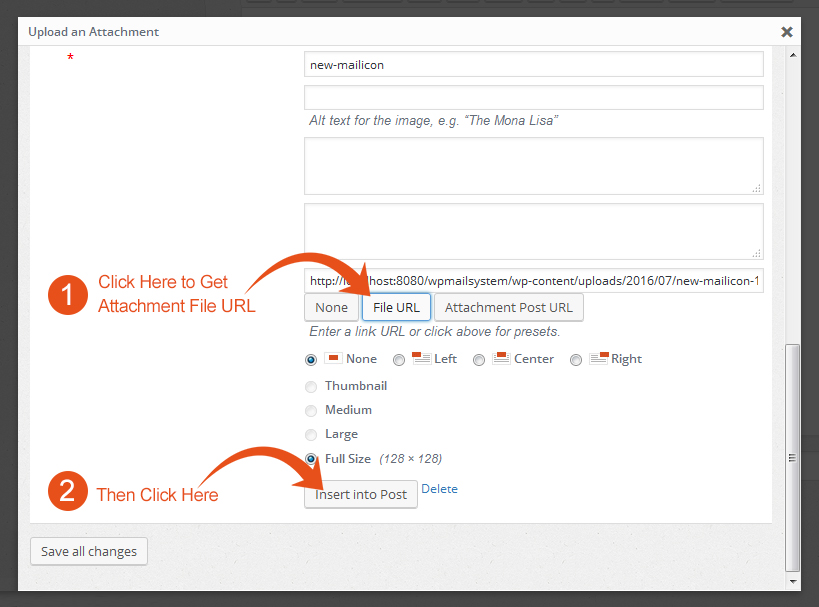
Then click on attachment then this window will appear. Then click on * File URL Button to get attachment path or url. Then after this click on * Insert into Post.
