InfoBar Top Notification Wordpress Plugin - Rating, Reviews, Demo & Download


Plugin Description
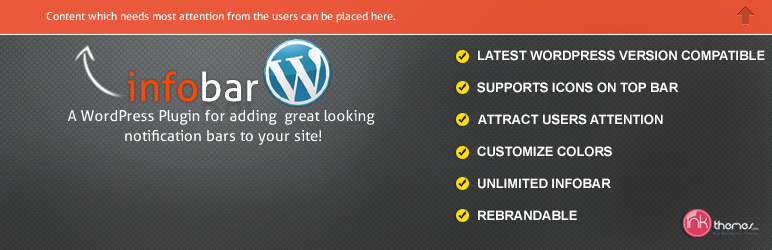
A quick and easy way to add top notification bar and call to action for your WordPress website.
It is important to provide the front visibility of your latest announcements in gist, on your website’s front-view, as it proves to be the effective communication tool to convey your latest updates to viewers, about your most appealing deals on website. Besides, when you release a new product, it should be highlighted on the top of your website so that it should be able to draw visitor’s attention frequently when they visit your site.
In order to meet this objective InfoBar Top Notification plugin is a great option.InfoBar Top Notification plugin is a website’s element that displays important messages/announcements/communique/bulletin/statistics to your viewers in a single statement. It is going to be displayed in the extreme top area of your website.If you want to promote your products or notify your customers about your latest emerging e-services, Infobar plugin is the key to perform the task for you.
InfoWay Premium WordPress Theme that is already have integrated with Notification bar system. So if you are looking for some very unique way of promote yourself InfoWay is the great option.
When the visitors visit your website/blog first thing that grab user attention is top notification bar.
Notification Bar is used to show latest happening on your website. You can use it to display Free offers, Contact Page links, You can grab attention to premium content, discount offers, distribution of E-Book, Help you to get feedback from your customers and much more.
This Plugin Works with all the premium WordPress Themes.
Upgrade to InfoBar Pro Version NOW! .
View InfoBar Live Demo.
Features of Infobar WP Plugin
- The plugin is simple and easy to use.
- You can highlight the most important content of your website.
- The content will be displayed on the top of the website.
- Chances of maximum click on the content.
- You can promote any useful content.
- It will help to improve your website’s statistics.
- Sticky Notification Bar.
- Choose color to match it to your site.
- Your can create unlimited InfoBar Notification.
- Compatible with Latest version of WordPress
- Attract Users Attention
- Customize Color to your choice by using color picker tools.(Manage Background Color and text color the notification bar strip).
Pro Version Features of Infobar Plugin
- The plugin is simple and easy to use.
- You can highlight the most important content of your website.
- The content will be displayed on the top of the website.
- It will help to redirect the use to other pages.
- Chances of maximum click on the content.
- You can promote any useful content.
- It will help to improve your website’s statistics.
- Sticky Notification Bar.
- Choose color to match it to your site.
- Your can create unlimited InfoBar Notification.
- You can rebrand it, by putting your own logo on it.
- Compatible with Latest version of WordPress
- Suport Icon on Top Notification Bar
- Attract Users Attention
- Customize Color to your choice by using color picker tools.(Manage Background Color and text color the notification bar strip).
- You can also customize font-size, notification bar width, display time, etc through setting option.
- Rebranding is also possible.
Links that will help you to improve your website.
- FormGet Contact Form.
- Sliding Contact Form By FormGet.
- Contact Form Integrated With Google Maps.
- Custom online form building.
Support
If you have any issues or need any help you can email me at pankajguna000@gmail.com.
Screenshots
-

To create your own notification follow the steps given below :
Go to Dashboard -> Info Bar icon -> Notification types -> New/edit entry.
Give the title to your notification in the Notification name field.
Give the background color of the infobar and font color of the text in Background Color and Font color field respectively. Just give the color name as blue, red, green etc. -

Click on Save button. You can see the new notification title name in the Entries table.
-

In the next step you need to import your notification you have created from Notification types to Notification entries. To do this follow the steps given below.
Go to Dashboard -> InfoBar -> Notification entries.
A Notification entries page will appear, you can see the sub-heading Content input under New/edit entry, give the suitable name to your notification bar in Name field.
In the Content text box type the message/content you want to display on your website. In the next step import the notification you have just created in Notification types.
You can see the sub heading Bar type settings under New/edit entry -> Content input.
Select the notification from the drop down list in front of Notification type field.
In Bar color give the color name, the background color you want to give to your notification bar.
In Font color give the name of the color, you want to show text color of the notification bar. -

Click on Save button. You can see the notification title name listed in an Entries table under the heading Notifications entries. See below the screenshot to get more clear picture in your mind.
-

In the next step, visit your website, you can see the required Infobar button up above the fold. See the screenshot below for reference.
-

Click on the Infobar button, you can see the sticky rectangular strip with defined text and color gets appear on the front-view, above the fold on your website, highlighting the required information. See below the screenshot.
-

If you want to show some mini icon along with the text you can do it in the following manner:
Go to Dashboard -> Media -> Add New. -

Click on Add New, Update New Media window appears.
-

When you will upload the image you can see the icon image on the Upload New Media window, click on the Edit button.
-

You will redirect to the Edit Media window, copy the File URL.
-

In the next step, insert the File URL.
Go to Dashboard -> Info Bar -> Notification types.
Below the Entries table click on the required notification you want to show the image icon, paste the File URL of the image next to an Icon path field.
Click on save button. -

You can see the icon with notification under the Entries table.
-

Now you can visit the site and see the change.
-

In Settings you can customize your Infobar in every possible related to setting cookies, changing the height of Infobar button and Infobar height itself.
Go to Dashboard -> Info Bar -> Settings. A Notification Settings window will appear.