Timed Content Wordpress Plugin - Rating, Reviews, Demo & Download

Plugin Description
The Timed Content plugin allows users to specify that a portion of a Page or Post should appear/be visible or disappear/be invisible based on given time characteristics. You can also make portions of a Post or Page be visible at certain dates and times; you can even set up a schedule!
The plugin adds the following:
- A “client-side” shortcode that allows the marking of content to appear or disappear after a given time interval; a “fade” effect is included. This functionality is intended to be used for special effects only, as content marked in this manner is still visible in the HTML source and, therefore, not a secure method of hiding content.
- Two “server-side” shortcodes that allow the marking of content to be visible only during specified date/time intervals. This functionality can be used as a secure method of hiding content, because the marked content will be included in the Page/Post only when viewed in the specified date/time intervals.
A TinyMCE dialog is included to help users build the shortcodes. See the Screenshots tab for more info.
Examples
[timed-content-client show="1:00"]Show me after one minute.  Since we don't want a fade-in, we can leave it out of the "show" attribute completely.[/timed-content-client]

[timed-content-client show="1:00:1000"]Show me after one minute with a 1000 millisecond (1 second) fade-in.[/timed-content-client]

[timed-content-client hide="1:00:1000"]Hide me after one minute with a 1000 millisecond (1 second) fade-out.[/timed-content-client]

[timed-content-client show="1:00:500" hide="5:00:2000"]Show me after one minute with a 500 millisecond (a half-second) fade-in, then hide me after five minutes with a 2000 millisecond (2 seconds) fade-out.[/timed-content-client]

[timed-content-server show="2013-09-13 20:30:00 -0600"]Show me starting at 8:30 PM Central Standard Time on September 13th, 2013. I will not be displayed before then.[/timed-content-server]

[timed-content-server hide="2013-09-13 20:30:00 America/Chicago"]Hide me starting at 8:30 PM Central Daylight Time (i.e., the same timezone as Chicago) on September 13th, 2013.  I will not be displayed after then[/timed-content-server]

[timed-content-server show="2013-09-13 20:30:00 -0600" hide="2013-09-13 21:30:00 -0600"]Show me starting at 8:30 PM Central Standard Time on September 13th, 2013, then hide me an hour later. I will not be displayed before or after then.[/timed-content-server]

[timed-content-rule id="164"]Display me based on the settings for the Timed Content Rule whoseID is 164.[/timed-content-rule]<h3>Usage</h3>
NOTE: All shortcodes can be built using the TinyMCE dialog. When in doubt, use the dialog to create correctly formed shortcodes.
The timed-content-client shortcode
[timed-content-client show="mm:ss:fff" hide="mm:ss:fff"]Example Text[/timed-content-client]
show– Specifies the time interval after loading the web page when the marked content should be displayed. The attribute consists of three parts,
separated by colons:mm– minutes,ss– seconds, andfff– if greater than0, a fade-in effect lastingfffmilliseconds is applied.hide– Specifies the time interval after loading the web page when the marked content should be hidden. The attribute consists of three parts,
separated by colons:mm– minutes,ss– seconds, andfff– if greater than0, a fade-out effect lastingfffmilliseconds is applied.
Both attributes are optional, but at least one attribute must be included. Leading zeros (0) are optional. The shortcode’s behaviour depends on which attributes are used:
showonly – Marked content is initially not visible, then appearsmmminutes andssseconds after loading with afffmillisecond fade-in.hideonly – Marked content is initially visible, then disappearsmmminutes andssseconds after loading with afffmillisecond fade-out.showandhide– Marked content is initially not visible, then appears according to the values set inshow, then disappears according to the values set inhide.
Your users must have JavaScript enabled for this shortcode to work.
The timed-content-server shortcode
[timed-content-server show="datetime" hide="datetime" debug="true|false|when_hidden"]Example Text[/timed-content-server]
show– Specifies the date/time when the marked content should start being included on the web page.hide– Specifies the date/time after which the marked content should stop being included on the web page.debug– Iftrue, adds some debugging statements to the web page as HTML comments. Ifwhen_hidden, the debugging statements are added only when the content is hidden. Defaults tofalse.
The date and time are expected to be yyyy-mm-dd HH:MM (similar to ISO 8601), for example 2019-04-07 15:30 for April 7, 2019, 15:30. For backward compatiblity old “human readable” date formats should also work, but these should not be used any longer!
In addition you can provide a timezone in the date/time parameter either as name or as offset like 2019-04-07 15:30 America/Chicago or 2019-04-07 15:30 +0200. If you do not provide a timezone, the WordPress timezone setting will be used as default.
Both show and hide attributes are optional, but at least one attribute must be included. The shortcode’s behaviour depends on which attributes are used:
showonly – Marked content is outputted only after the date/time set here.hideonly – Marked content is outputted only before the date/time set here.showandhide– Marked content is outputted only during the time period defined by theshowandhideattributes.
The timed-content-rule shortcode
[timed-content-rule id="{rule_id}|{rule_name}"]Example Text[/timed-content-rule]
You can find the correct shortcode from the Timed Content Rules overview page, or use the TinyMCE dialog.
Testing server side rules
For testing the behaviour of server side rules at specific times, you may use the GET parameter tctest in an URL, followed by date and time in the format YYYY-MM-DD+hh:mm:ss. This works only you are logged in with a user which has the right to edit the displayed page or post. For example: http://mysite.example?tctest=2018-02-10+19:16:00 will show the content as if it was February 10, 2018 at 19:16.
Developer Documentation
Action hooks
add_action( "timed_content_server_show", "{function_name}", {priority_level}, 4 );
Fired when the [timed-content-server] shortcode is encountered AND the content is to be displayed based on the shortcode’s show/hide attributes. Functions using this hook should accept the following arguments in order:
$post_id– the ID of the currently displayed Post/Page$show– the value of theshowattribute. If not set, defaults to “1970-Jan-01 00:00:00 +000”$hide– the value of thehideattribute. If not set, defaults to “2038-Jan-19 03:14:07 +000”-
$content– The content enclosed by the shortcodeadd_action( “timed_content_server_hide”, “{function_name}”, {priority_level}, 4 );
Fired when the [timed-content-server] shortcode is encountered AND the content is to be hidden based on the shortcode’s show/hide attributes. Functions using this hook should accept the following arguments in order:
$post_id– the ID of the currently displayed Post/Page$show– the value of theshowattribute. If not set, defaults to “1970-Jan-01 00:00:00 +000”$hide– the value of thehideattribute. If not set, defaults to “2038-Jan-19 03:14:07 +000”-
$content– The content enclosed by the shortcodeadd_action( “timed_content_rule_show”, “{function_name}”, {priority_level}, 3 );
Fired when the [timed-content-rule] shortcode is encountered AND the content is to be displayed based on the Timed Content Rule’s properties. Functions using this hook should accept the following arguments in order:
$post_id– the ID of the currently displayed Post/Page$rule_id– the ID of the Timed Content Rule being called. Useget_post_meta( $rule_id )to get the Rule’s properties.-
$content– The content enclosed by the shortcodeadd_action( “timed_content_rule_hide”, “{function_name}”, {priority_level}, 3 );
Fired when the [timed-content-rule] shortcode is encountered AND the content is to be hidden based on the Timed Content Rule’s properties. Functions using this hook should accept the following arguments in order:
$post_id– the ID of the currently displayed Post/Page$rule_id– the ID of the Timed Content Rule being called. Useget_post_meta( $rule_id )to get the Rule’s properties.$content– The content enclosed by the shortcode
Filter hooks
timed_content_filter
Filter for any content enclosed by a Timed Content shortcode. Implements the same filters as the_content:
wptexturizeconvert_smiliesconvert_charswpautopprepend_attachment-
do_shortcodetimed_content_filter_override
Replaces the timed_content_filter with another pre-existing filter to use for any content enclosed by a Timed Content shortcode. Any function hooked into this filter must return the name of a filter (as a string).
Screenshots
![An example showing use of the <code>[timed-content-client]</code> shortcode. The "alarm clock" button on the editor menubar brings up a dialog box to help build the Timed Content shortcodes.](https://ps.w.org/timed-content/assets/screenshot-1.png?rev=2953069)
An example showing use of the
[timed-content-client]shortcode. The “alarm clock” button on the editor menubar brings up a dialog box to help build the Timed Content shortcodes.
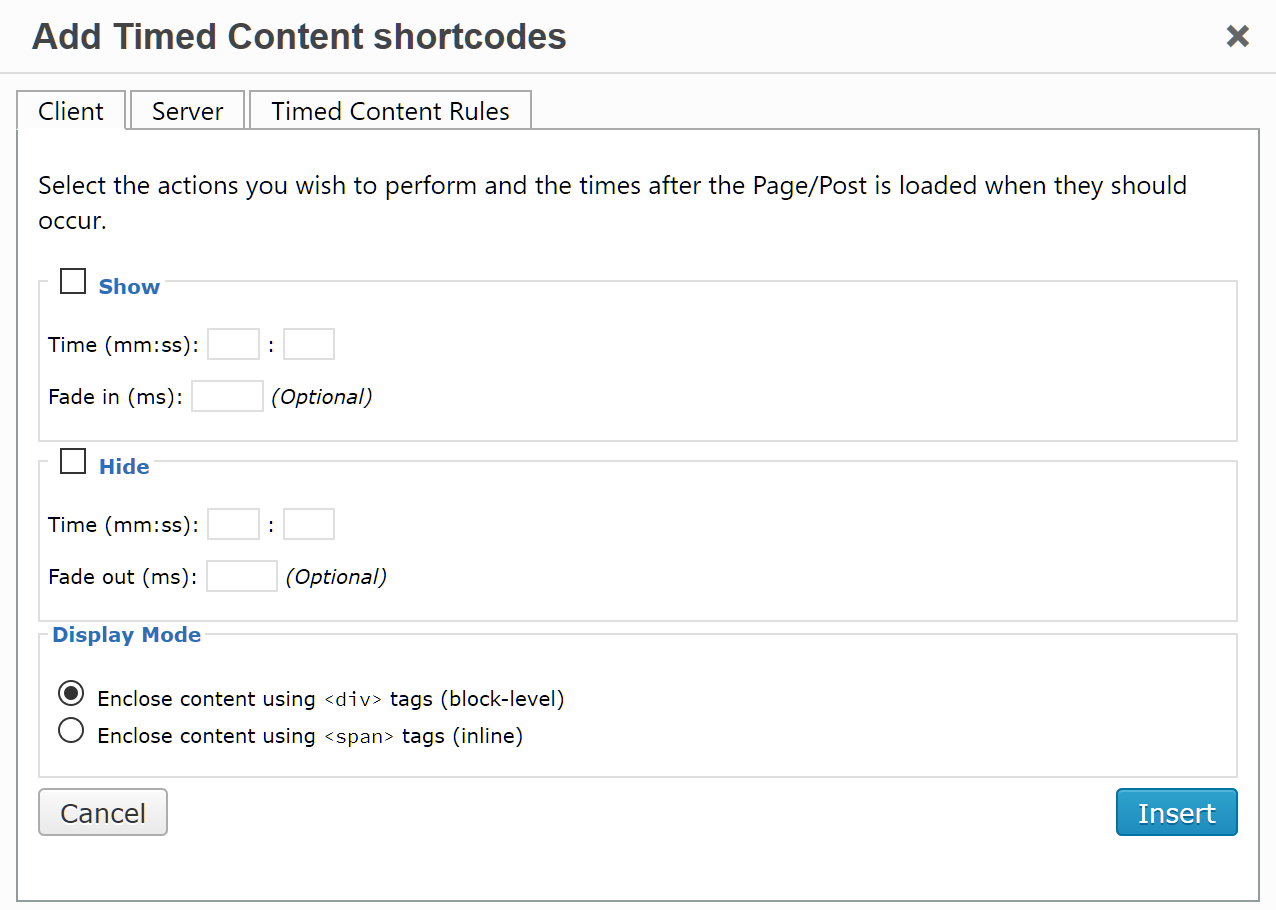
The “Add Timed Content shortcode” dialog showing the Client tab. Check the attribute you want to add and fill in the textboxes.

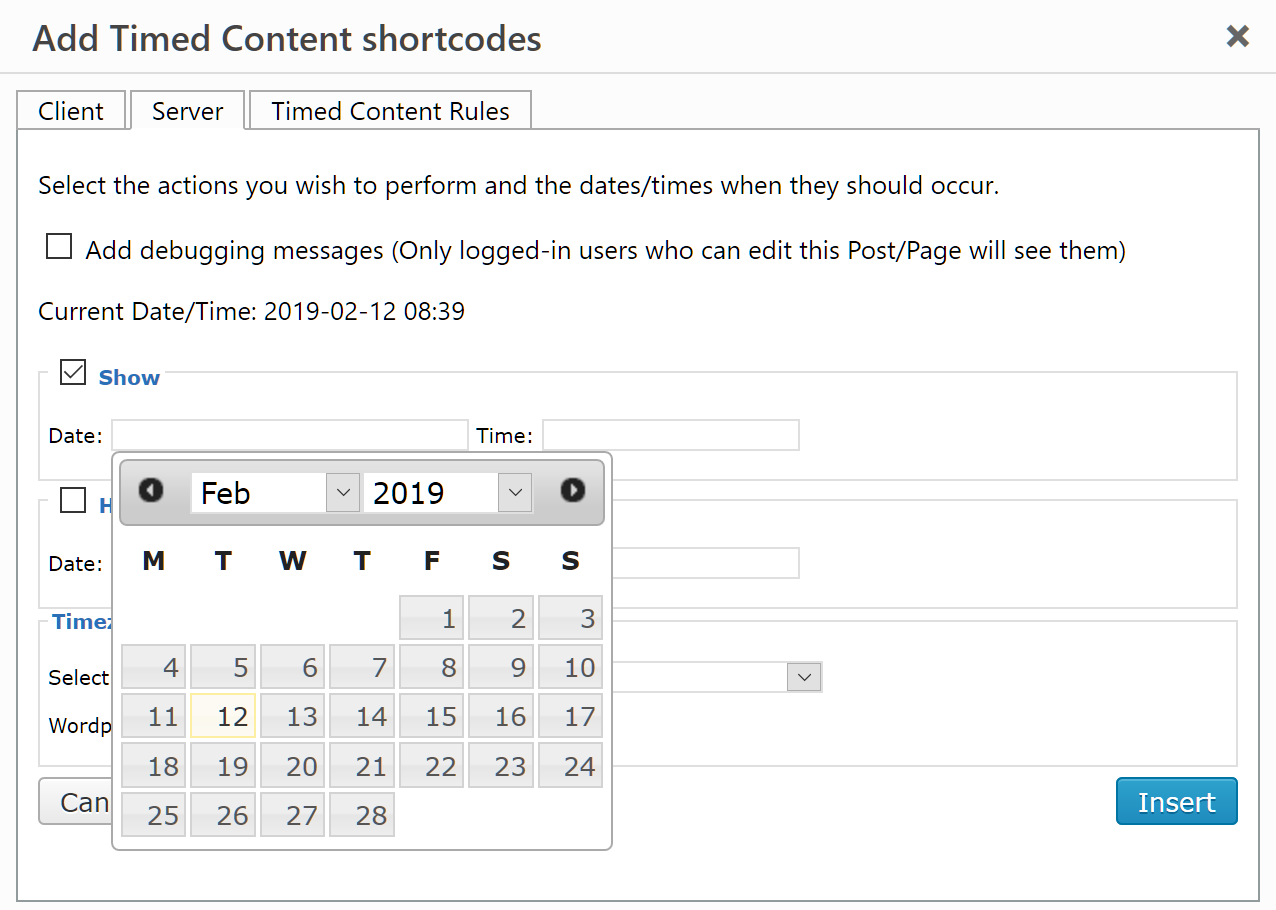
The “Add Timed Content shortcode” dialog showing the Server tab. Check the attribute you want to add, then click on the Date and Time textboxes.

The date and time pickers help you format a correct date and time. Here’s the jQuery UI Datepicker in action.

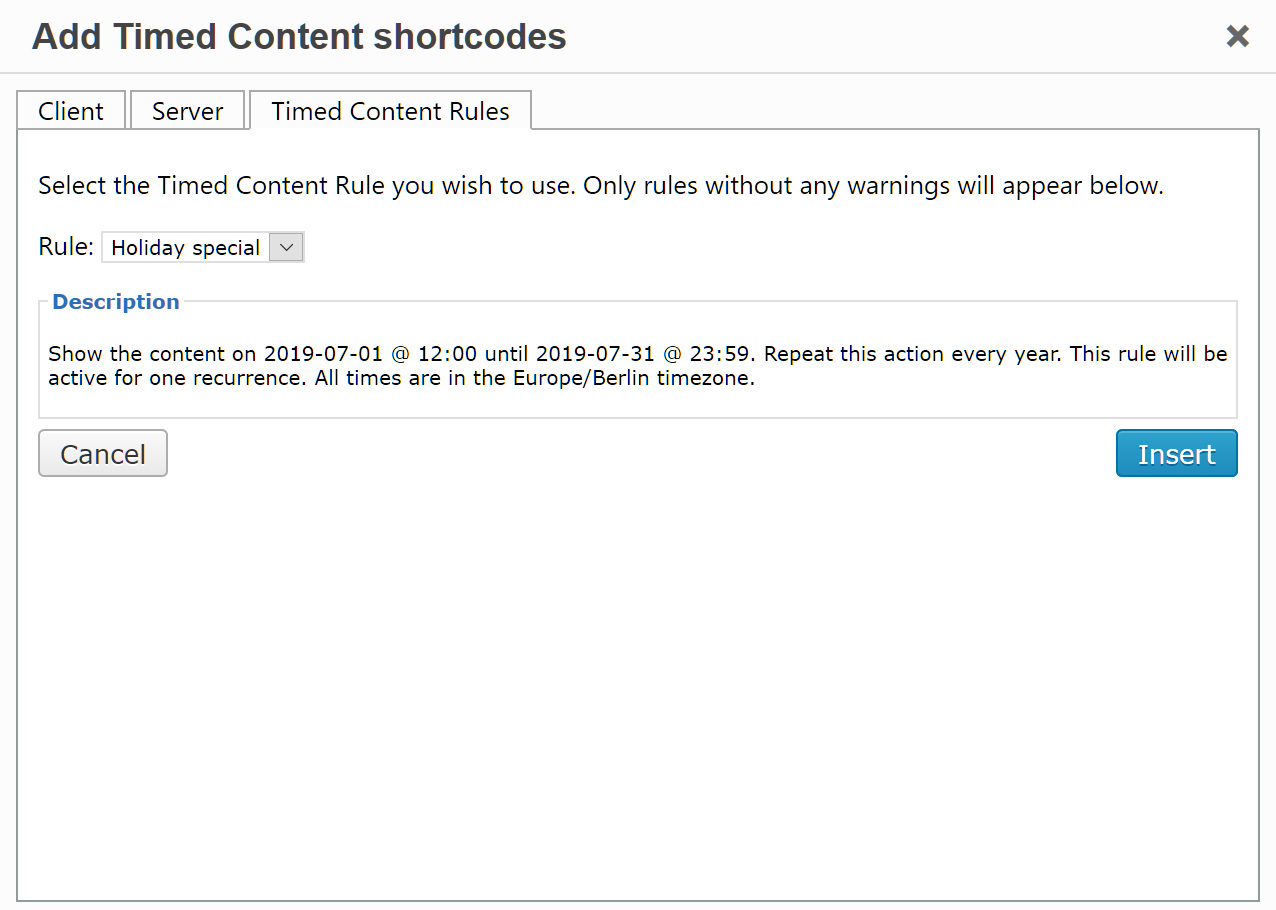
The “Add Timed Content shortcode” dialog showing the Timed Content Rules tab.


