Webside Popup Creator Wordpress Plugin - Rating, Reviews, Demo & Download

Plugin Description
Webside Popup Creator is a simple yet flexible plugin designed to help you create and manage popups on your WordPress website without hassle. Whether you want to display promotional messages, capture leads with a simple form, or show important notices, this plugin provides the essential tools in a lightweight package.
Built with simplicity and performance in mind, Webside Popup Creator avoids unnecessary bloat, focusing on core features that work effectively. This plugin is licensed under the GPLv2 (or later), ensuring compatibility with WordPress standards.
Key Features:
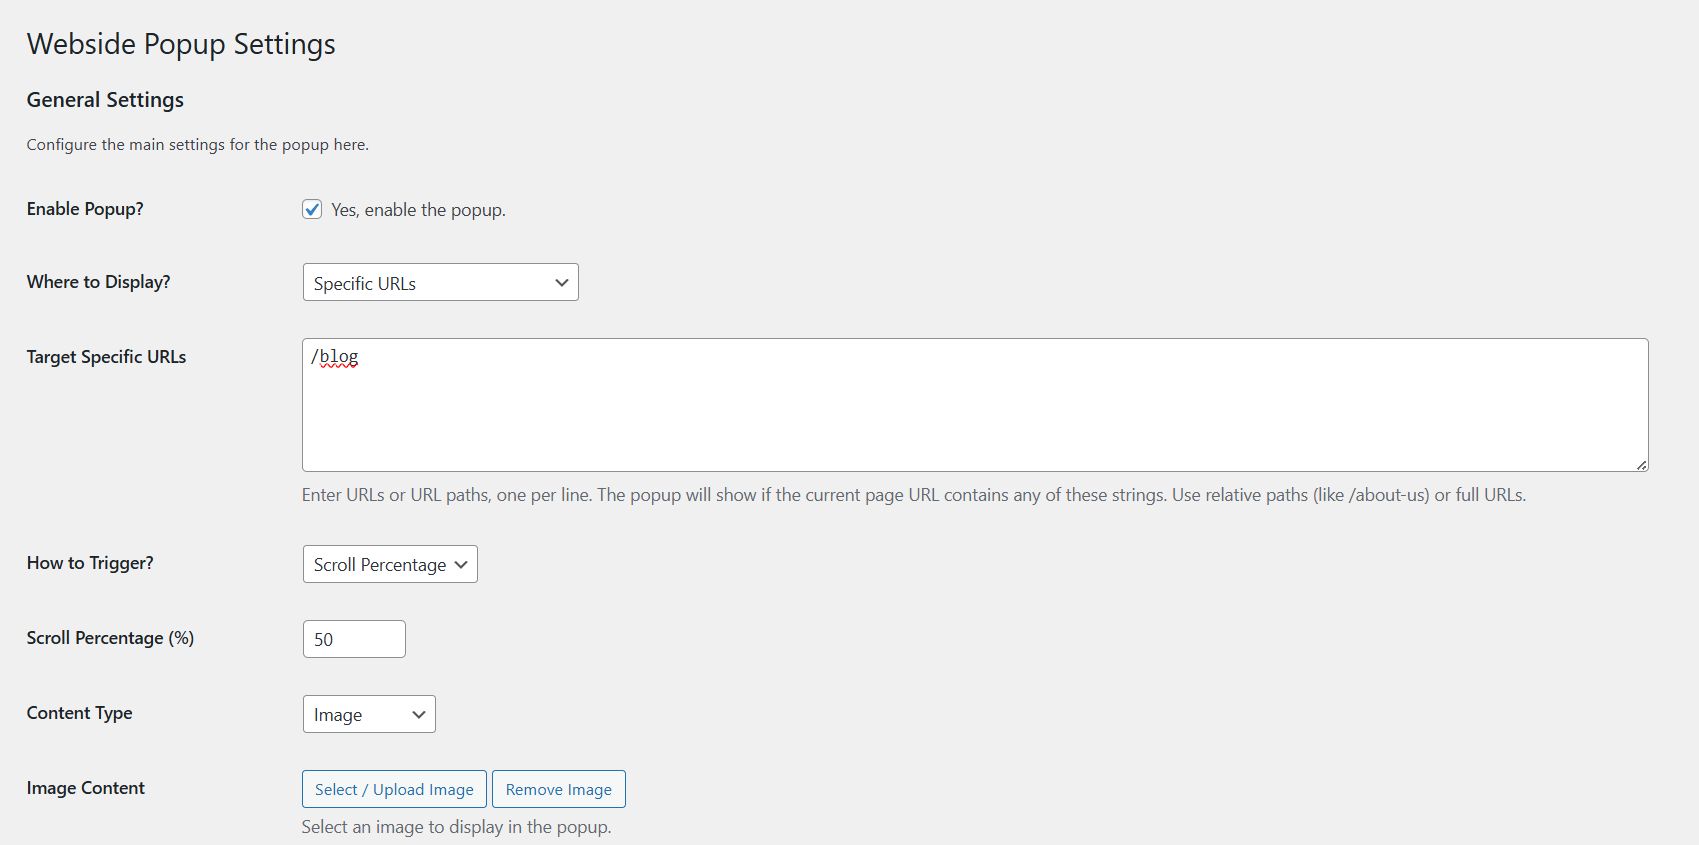
- Easy Configuration: A straightforward settings page integrated into the WordPress admin area (Settings > Webside Popup). Also includes a quick “Settings” link on the main Plugins page.
- Multiple Trigger Options:
- Time Delay: Show the popup after a specific number of seconds.
- Scroll Percentage: Trigger the popup when a user scrolls down a certain percentage of the page.
- Flexible Content Types:
- HTML Content: Use the standard WordPress editor (or simple textarea) to add any HTML, including text, links, basic forms, and shortcodes.
- Image Content: Easily upload or select an image from the media library to display as the popup (uses
wp_get_attachment_imagefor better theme compatibility). Optionally make the image clickable by adding a link URL.
- Targeting Controls:
- Display on the entire site.
- Display everywhere except the homepage.
- Display only on the homepage.
- Display only on single blog posts.
- Display only on specific URLs or URL paths (enter one per line).
- Appearance Customization:
- Adjust the background overlay opacity.
- Set a custom border-radius for the popup container corners.
- Closing Options:
- Standard ‘X’ close button.
- Optionally allow users to close the popup by clicking on the background overlay.
- Cookie Control: Prevent the popup from showing repeatedly to the same user by setting a cookie. You can define the cookie expiration duration in hours or days.
- Responsive Design: Popups are designed to display correctly on different screen sizes (desktop, tablet, mobile).
- Lightweight: Minimal code to ensure fast loading times.
- GPLv2 Compatible: Licensed under GPLv2 or later, aligning with WordPress guidelines.
- Standards Compliant: Uses WordPress enqueue functions (
wp_enqueue_script,wp_enqueue_style,wp_localize_script,wp_add_inline_style) for loading assets and unique function prefixes (webspop_).
Configuration
After activating the plugin:
- Navigate to Settings > Webside Popup in your WordPress admin menu (or click the “Settings” link directly from the Plugins page).
- Enable Popup: Check this box to activate the popup functionality.
- Where to Display: Choose where the popup should appear (Entire Site, Everywhere Except Homepage, Homepage Only, Posts Only, Specific URLs).
- If you select “Specific URLs”, enter the target URLs or paths (one per line) in the text area below. This field will appear faded if “Specific URLs” is not selected, but it’s always present. Examples:
/about-us,/products/,https://yourdomain.com/contact. The popup will appear if the current page URL contains any of the provided strings.
- If you select “Specific URLs”, enter the target URLs or paths (one per line) in the text area below. This field will appear faded if “Specific URLs” is not selected, but it’s always present. Examples:
- How to Trigger: Select whether the popup should appear after a time delay or after the user scrolls down the page.
- Configure the Delay (Seconds) or Scroll Percentage (%) accordingly.
- Content Type: Choose between “HTML Code” or “Image”.
- HTML Code: Enter your desired HTML content in the text area. You can include text, links, images, and basic form elements.
- Image: Click “Select / Upload Image” to choose an image from your media library. Optionally, enter a URL in the “Image Link URL” field to make the image clickable (opens in a new tab). The preview will update after saving.
- Appearance:
- Adjust the Overlay Opacity (0 = fully transparent, 1 = fully opaque).
- Set the Border Radius in pixels for rounded corners.
- Closing: Decide if users should be able to close the popup by clicking the Overlay.
- Optional Settings:
- Prevent Showing Again (Cookie): Check this box to enable cookie-based frequency capping.
- Cookie Expiration: Set the duration (e.g., 24) and unit (Hours or Days) for how long the popup should stay hidden after being closed.
- Click Save Settings.
Your popup should now be active based on your configuration!
Screenshots
The main settings page in the WordPress admin area. (screenshot-1.png)
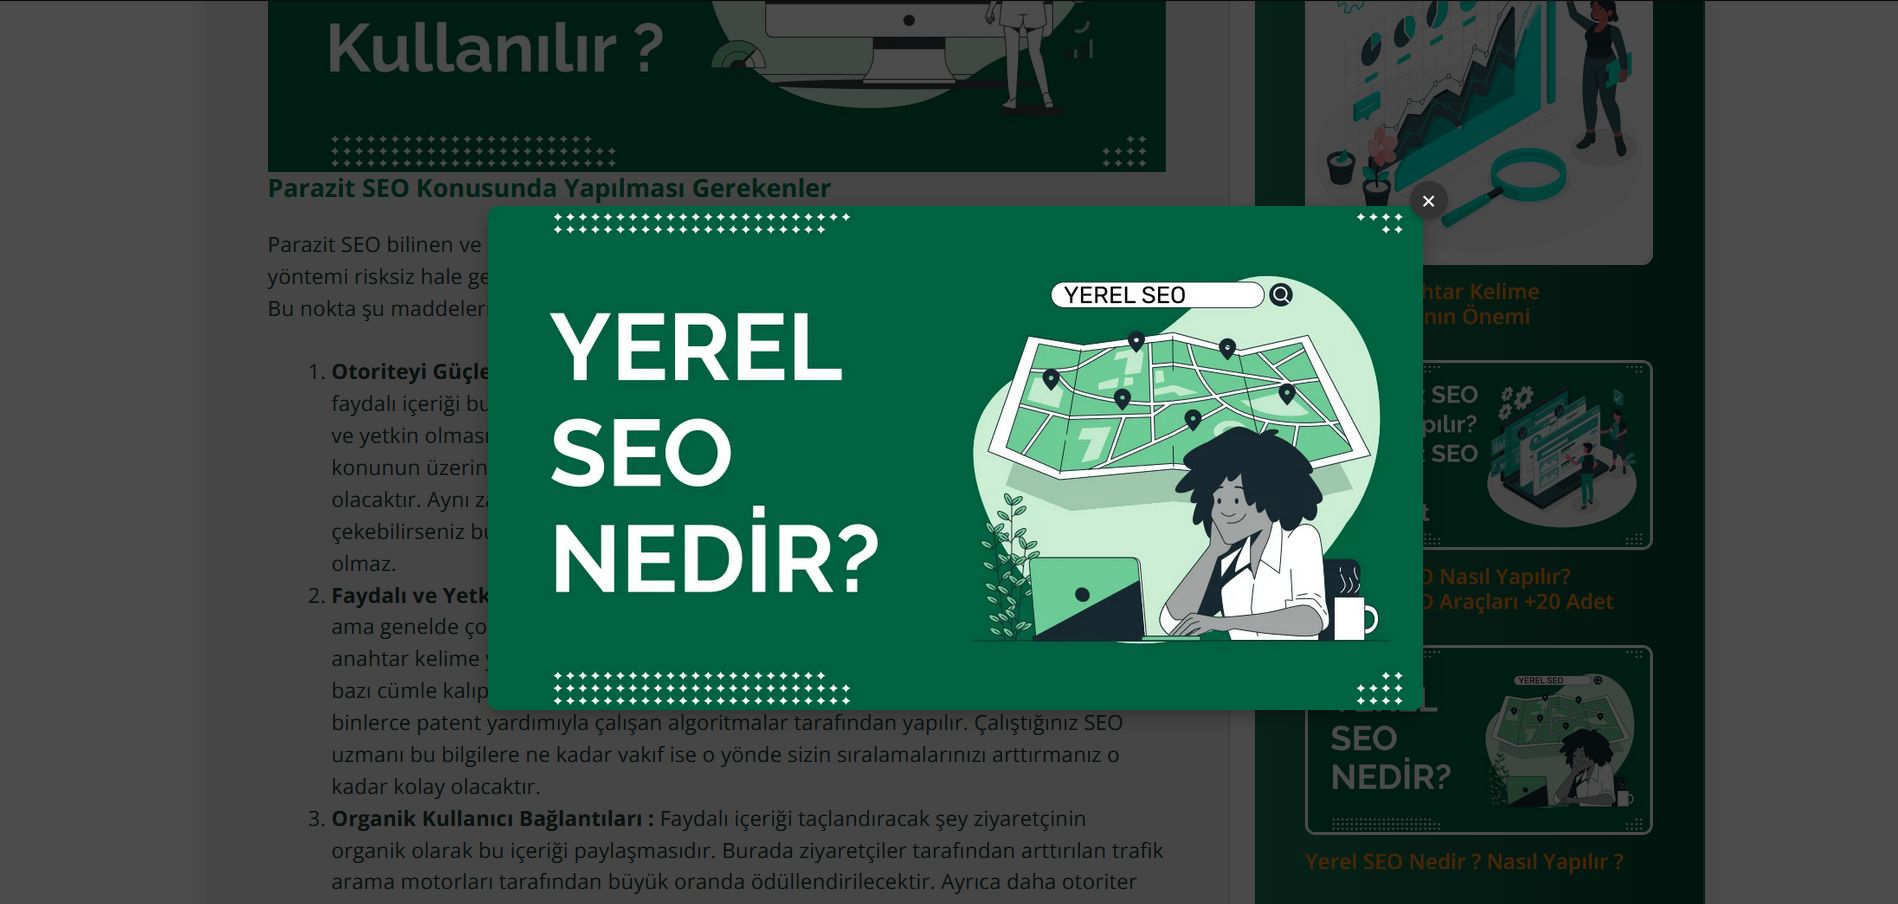
Example of a popup triggered by time delay with HTML content. (screenshot-2.png)